
How Painless Reuse React Components between Projects

You will get in a situation when you will need to use the same React Component across two projects. When I got there I was just copying and pasting code between the projects. As a result, I end up spending way too much and effort to support the consistency of the Component across the projects.
Consequences of messing around with copied components:
- Inconsistent UI and Functionality across projects
- Spending extra time trying to support the Components in all projects it is used
- Taking extra mental space on remembering what changes you made in the component
- Difficult to collaborate with other developers
Solution for painless components reuse
After browsing, the internet found a tool Bit.dev, which helps to reuse React components Between projects. Also, Bit.dev provides a cloud service where you can easily create your component libraries.
So I want to share with you how to easily start reusing code in between your projects. Hope this will help you to make your developer’s life a bit better.
Project Overview
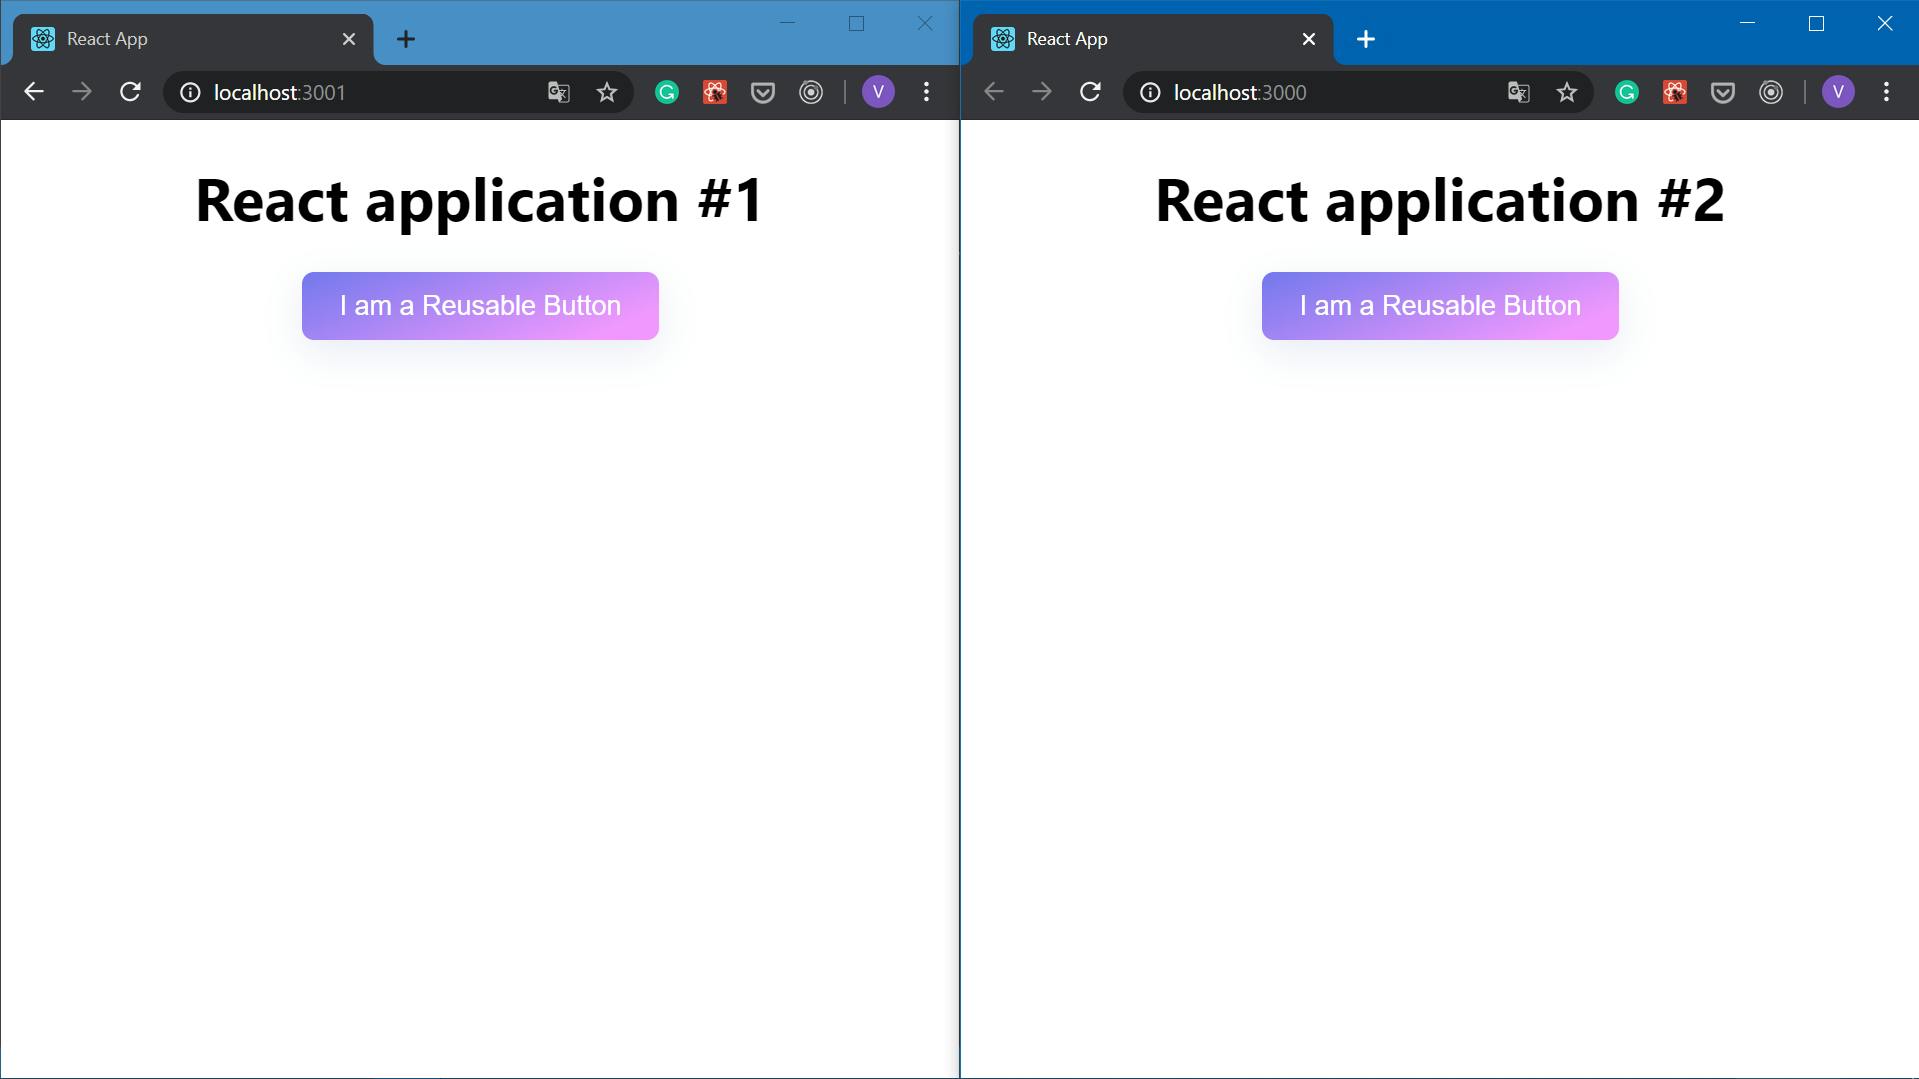
I want to show you how to integrate Bit.dev in your workflow and start reusing your components between your Projects. I am going to use Button Component and two React projects created with CRA to demonstrate how it works.
I will show you the basics of workflow with bit.dev
- Create bit.dev account
- Creating reusable components
- Using components in other projects
- Modifying imported components
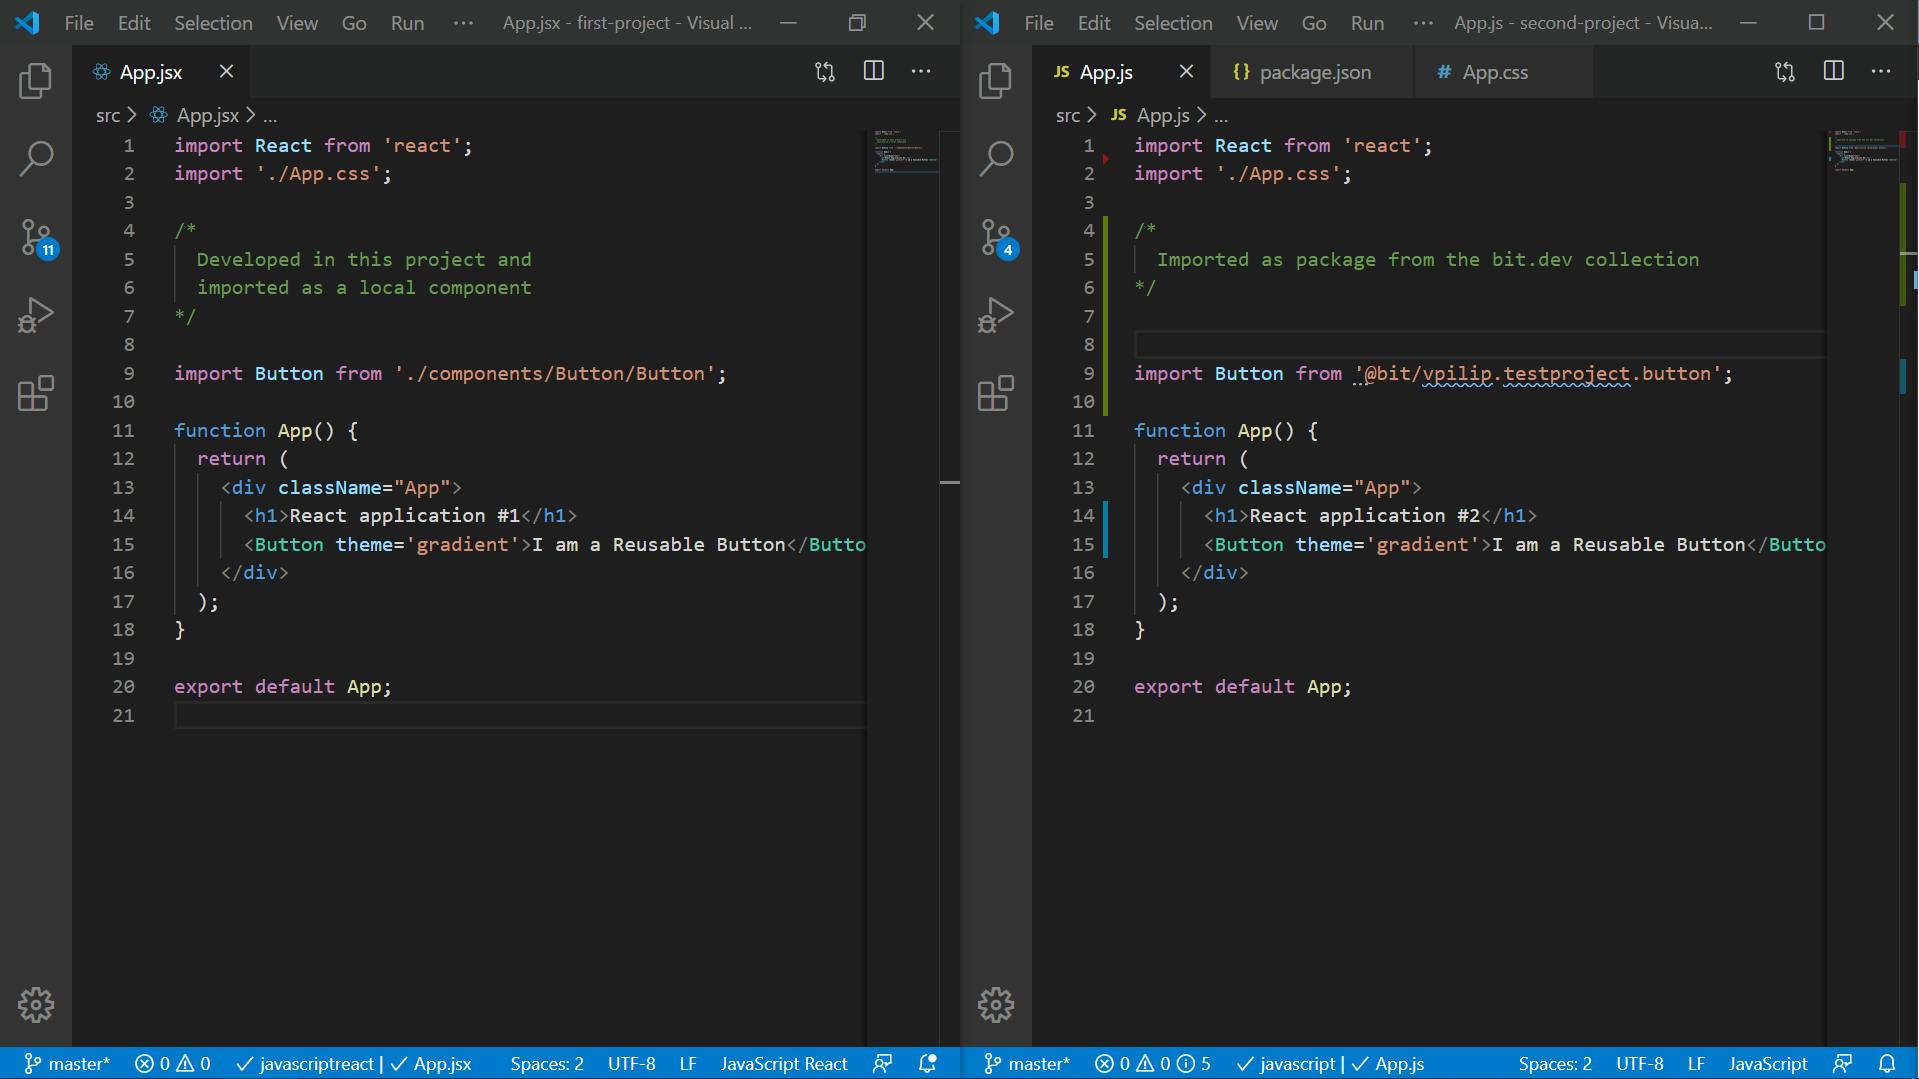
This is an example of how I took a component from the first application, made it reusable and imported into another application.
Preparations
Install Bit globally on your machine.
npm install bit-bin -g
Then you need to create your Bit.dev account. It will be a place where you will store all of your components and create collections from them.
After that create a collection for your components.

Now you are set to start sharing your components :)
Creating reusable components
WorkSpace initialization
Open the folder with a project on which components you want to share. And then initialize bit workspace. In my case, this is a project where I developed my button.
bit init
Login in to your bit account.
bit login
Track component which you want to share
To tell Bit what component we want to make reusable we need to start tracking it. I want to share a Button component.
My project folder structure looks like this.
| ...
| public
| src
| components
   | Button
     - Button.jsx
     - Button.module.scss
   - App.jsx
   - index.js
   - index.css
 | package.json
 | ...
bit add ./src/components/Button
Configuring Dependencies of your component
Then you will need to configure the dependencies of the future components. Components packages should be lightweight and contain only component related code. So we need to mark dependencies which are necessary for the projects where we will use our components.
import React from 'react';
import styles from './Button.module.scss';
const Button = (props) => {
     const buttonClasses = [styles.button];
     if (props.centred) buttonClasses.push(styles.button_centred);

     //More code...

     return (
         <button
             className={buttonClasses.join(' ')}
             onClick={props.onClick}>
             <span>
                 {props.children}
             </span>
         </button>
     );
 };
 export default Button;
To specify these dependencies you need to add this block to your package.json file.
...
"peerDependencies": {
     "react": "^16.13.1",
     "react-dom": "^16.13.1",
     "react-scripts": "3.4.0",
     "node-sass": "^4.13.1"
 },
...
Adding compiler for our component
Your component can be imported in other projects as source code or as an npm package. NPM Package should contain compiled CSS and js to work on any project. So we need to specify which compiler is needed for our component.
To add compiler for React Components run this
bit import bit.envs/compilers/react — compiler
If you use React with Typescript you need to this compiler
bit import bit.envs/compilers/react-typescript — compiler
Other compilers you can find there.
Pushing the component to cloud
Now we did everything necessary to publish our component. To check a component status you can run bit status.
Before publishing, we need to tag it. Tagging is somewhat similar to git commit. To tag your component you need to run the command bit tag --all [version]. A version of the component should be named according to this standard.
bit tag --all 0.0.1
Then to push it to the cloud run bit export <username>.<collection>. Where username and collection are your bit account and bit collection names. It can require to enter your account username and password.
bit export vpilip.bittutorial
Viewing your component in the bit dev
Open your bit account and the collection you created. You will see something like this.

You will notice that your component doesn’t have a preview. If you want to generate one you need to:
- Open component
- In the code-editor show a use case of your component
- Press Save
That’s it, now your component prepared to be reusable, stored in the bit.dev cloud and can be imported into any project!
Importing reusable components into another project
Let’s open another project and I will show you how to import reusable components
You have two options on how to import your component into the project. You can either import it as a package or as source code. Both options can be are backward compatible.
Importing component as source code is preferable only if you are going to modify it.
To import component as a package you need to run either yarn add or npm i. Your packages will be named in this format @bit/<username>.<collection name>.<component name>.
For some reason npm i throws errors sometimes but yarn add works pretty well.
yarn add @bit/vpilip.bittutorial.button
And then you can use this component just as a usual npm package.
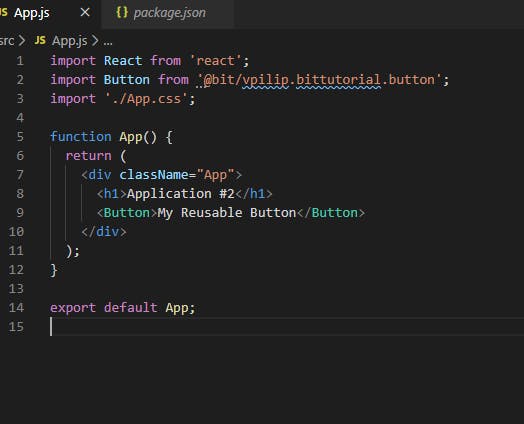
Since I use SCSS in my components I also need to install node-sass in this project. Then everything works like a charm.

Modifying reusable components
To modify your component you need to import a source code of your component into your project. You can do this with a command bit import <useraname>.<collection name>/<component name> --path <path where import component> . Using / instead of . isn’t a mistake.
Param path points a folder in which your component should be installed. The folder you point to shouldn’t exist otherwise you will get an error. If you want to put the Button component into the folder ./src/components/. You need to make sure that folder Button doesn’t exist.
Before importing a source code of the component you need to init bit workspace in your second project. So run bit init first and then:
bit import vpilip.bittutorial/button — path ./src/components/Button
The file structure of the imported component:
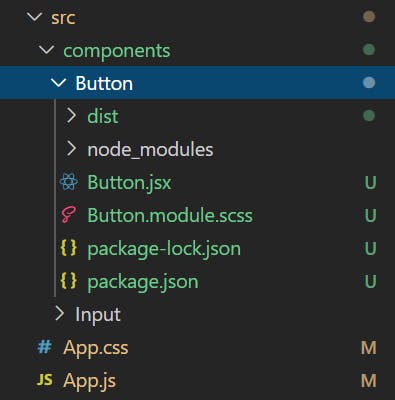
Inside of the Button folder, you will see the source code of the component and files related to the packaging of the component. Just don’t pay attention to them, you need only source code of the component.
After importing the component its dependency in the package.json file changed to the local path.
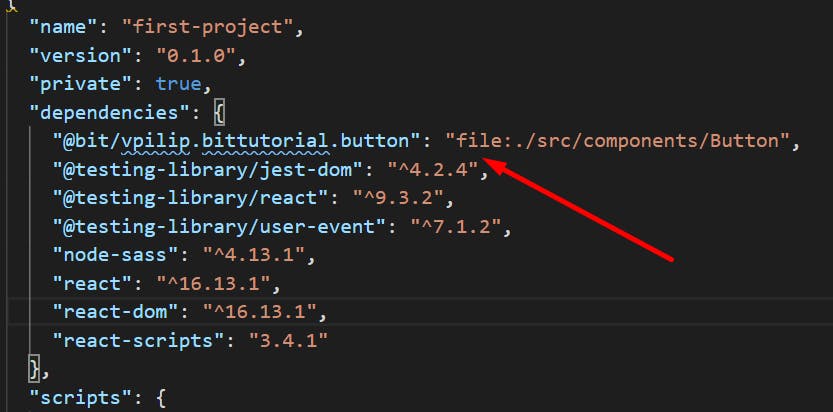
Because of this wee need to change our import ‘s statements where we use this component. Add /Button in the end to use source code and not a compiled version.
The updated import in my file looks like this.
import Button from '@bit/vpilip.testproject.button/Button';
Now you can edit your component as you wish. And then you can push this component to the cloud as described in the section “Pushing the component to cloud”
---
I hope after this tutorial you will have a solid understanding of how to reuse React components between projects. And you will be able to start using Bit.dev in your workflow :)
You can learn more about what you can do with Bit in the official documentation.
---
Thanks for reading! :)
I am Vova Pilipchatin, a freelance Software Engineer and Web Developer.
If you are enjoyed this article, please follow me on Twitter.
There I share what I learn about developing web apps, launching SaaS projects and building a freelance business :)
Get posts on Building SaaS and Interent-Powered Buissness right in your inbox
 Lessons and stories from my entrepreneurial journey
 Advices, stories and interviews from SaaS Founders and Marketers